Friday 15 April 2016

The best Brisket ever ... from HiLow Angus in Saskatchewan

Most chefs aim higher than just a plain hamburger stuffed into a squishy. Some add cheese ... some add condiments ... some add lettuce ...

Well, I said to my students, why not just aim for better everything? Let's get better meat, better bread, better condiments and better ... well, better everything.

Wassup Chef?

Wassup is one of the finest meals these students have made. Home-made ciabatta buns still warm from the oven, filled with house-slow-roasted brisket and caramelized sugar onions and sweet, sweet mustard from the sunny fields of Saskatchewan. "There are fancier meals somewhere", I told them, "but few better than what you're going to make." Let's go!

We started four days before our dinner, on Monday making starter (called 'Biga') for our ciabatta buns. Chefs Michael and Noah made it up for us, and gently stowed it in the bottom of an unused cupboard, at the back, in the dark.

How's that for tender care of your food? The biga couldn't be happier though ... it worked perfectly on Thursday.

On Wednesday we started making the brisket, with a group of chefs prepping all the vegetables
which would surround the meat in a very slow oven. We piled it high with butternut squash, sweet potato, celery and onion chunks all tossed in a rosemary dressing with rather a lot of pepper and garlic added in.
Our brisket was sourced directly from the farm ... Dan Howell at HiLow Angus, on the very edge of the beautiful Qu'Apelle Valley in Saskatchewan, has a lovely herd of Black Angus cattle, and he raises them with great care. The brisket was from one of his excellent herd, and it was just a beautiful piece of meat to work with. Every chef should be so lucky!

The brisket was prepared by removing some of the larger bits of fat marbling (not needed for this dish) and putting on a dry rub of 2 parts coarse pepper to 1 part coarse salt. Chef Ren took care, working with Chef Tai,
to get the dry rub well worked into the meat and kept the coverage even. Then the beast was put into a deep roasting pan on a wire rack, and entirely covered with the prepared veg
and had a little stock added in (we make all our own stocks at Monarch Park, both brown and white stock). The whole pan was sealed up tight with tinfoil by Chefs Yuen Feng and Dan
and put into a 200 degree oven (that is not a mis-print ... just two hundred degrees) for a long, slow roast of 24 hours. Then we cleaned up the kitchen and walked away to do something else.

=========== segue to the next day =============

Early on thursday Chef Karlye came into the kitchen at just after 07h00 to help make bread for everyone. By the time the rest of the brigade arrived the dough was made and the clean-up complete.
The rising was finished at just after 09h20 and the dough was punched down, cut, rolled, formed and set out to proof.

Then ... time to check on our all-night science experiment (according to one doubting Thomas). Would the brisket be cooked? Would it even be edible? Would it taste good?

Out it came from the oven ... aaaaanndd ...

OMG that smells SO good Chef!

So we got to shredding it with plain old kitchen table forks
while another group of chefs made 5 kg of caramelised sweet onions (Chef Brandon here showing excellent technique and focus)
and Chef Sabrina dug up every type of mustard we had in the kitchen. We always feature Kozliks mustards here, and today added three delicious mustards (cranberry, green and a VERY hot) from Gravelbourg, Saskatchewan, to ensure that there was strong representation from The West.

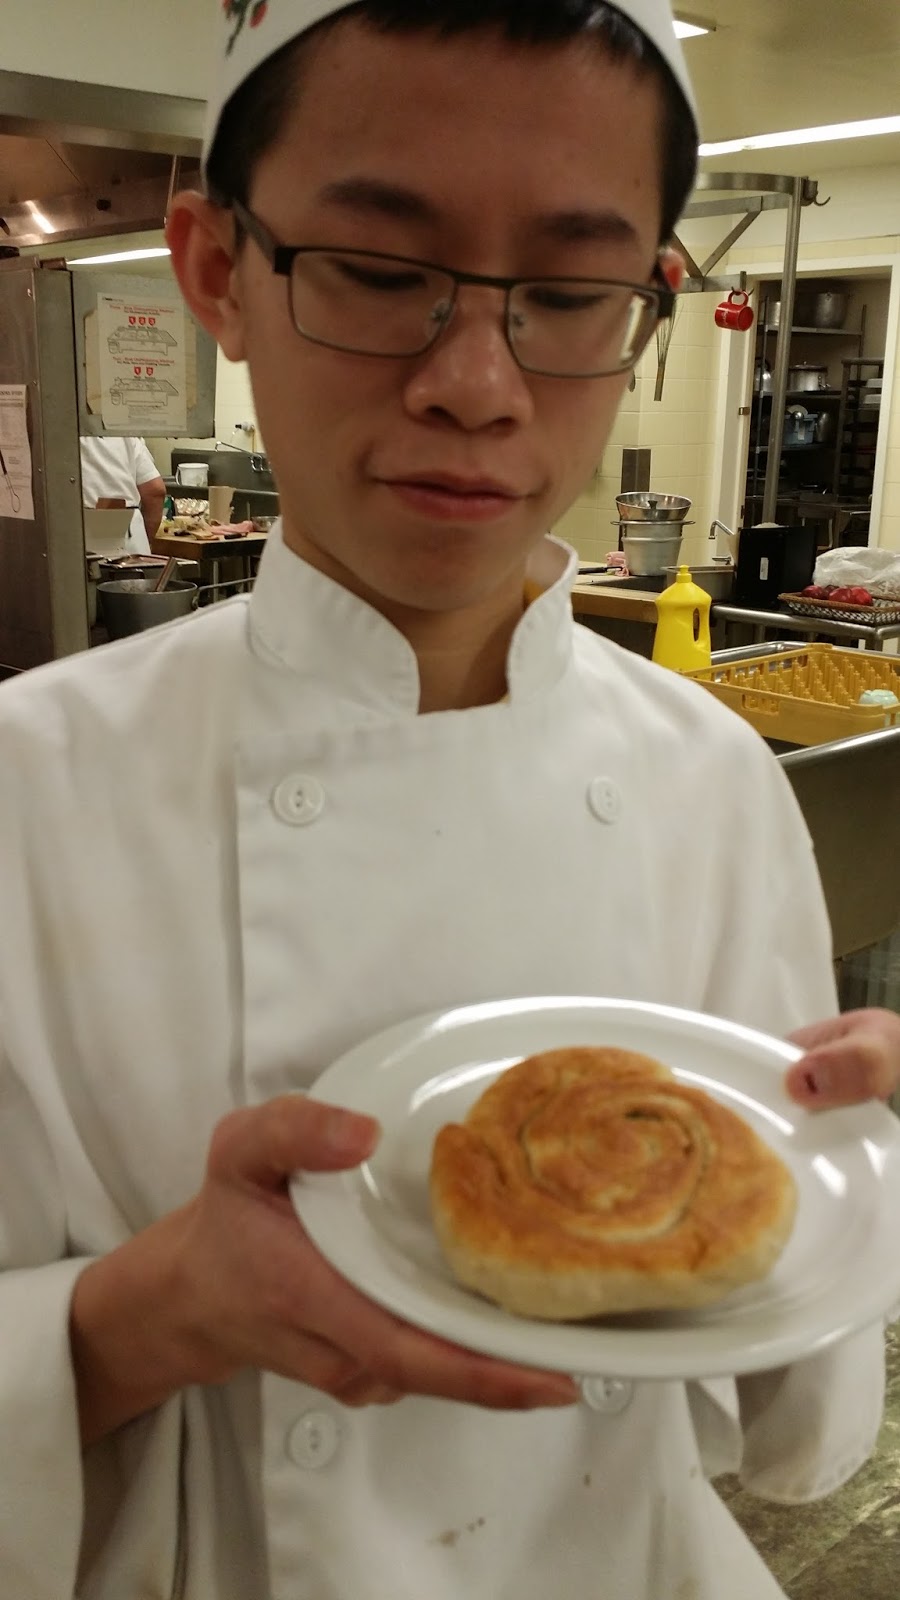
We baked all the buns.

We set out our banquet in the kitchen in the area behind the hot line.

We sent Chef Jessica up to the room where a special group of students work in Monarch Park, and they are the ones who do our laundry 3 times a week. Jessica invited all of them, plus their teacher Mr Jay Arrington and the teaching assistants to come down and join us for a real home-made all-Canadian treat.

They came.

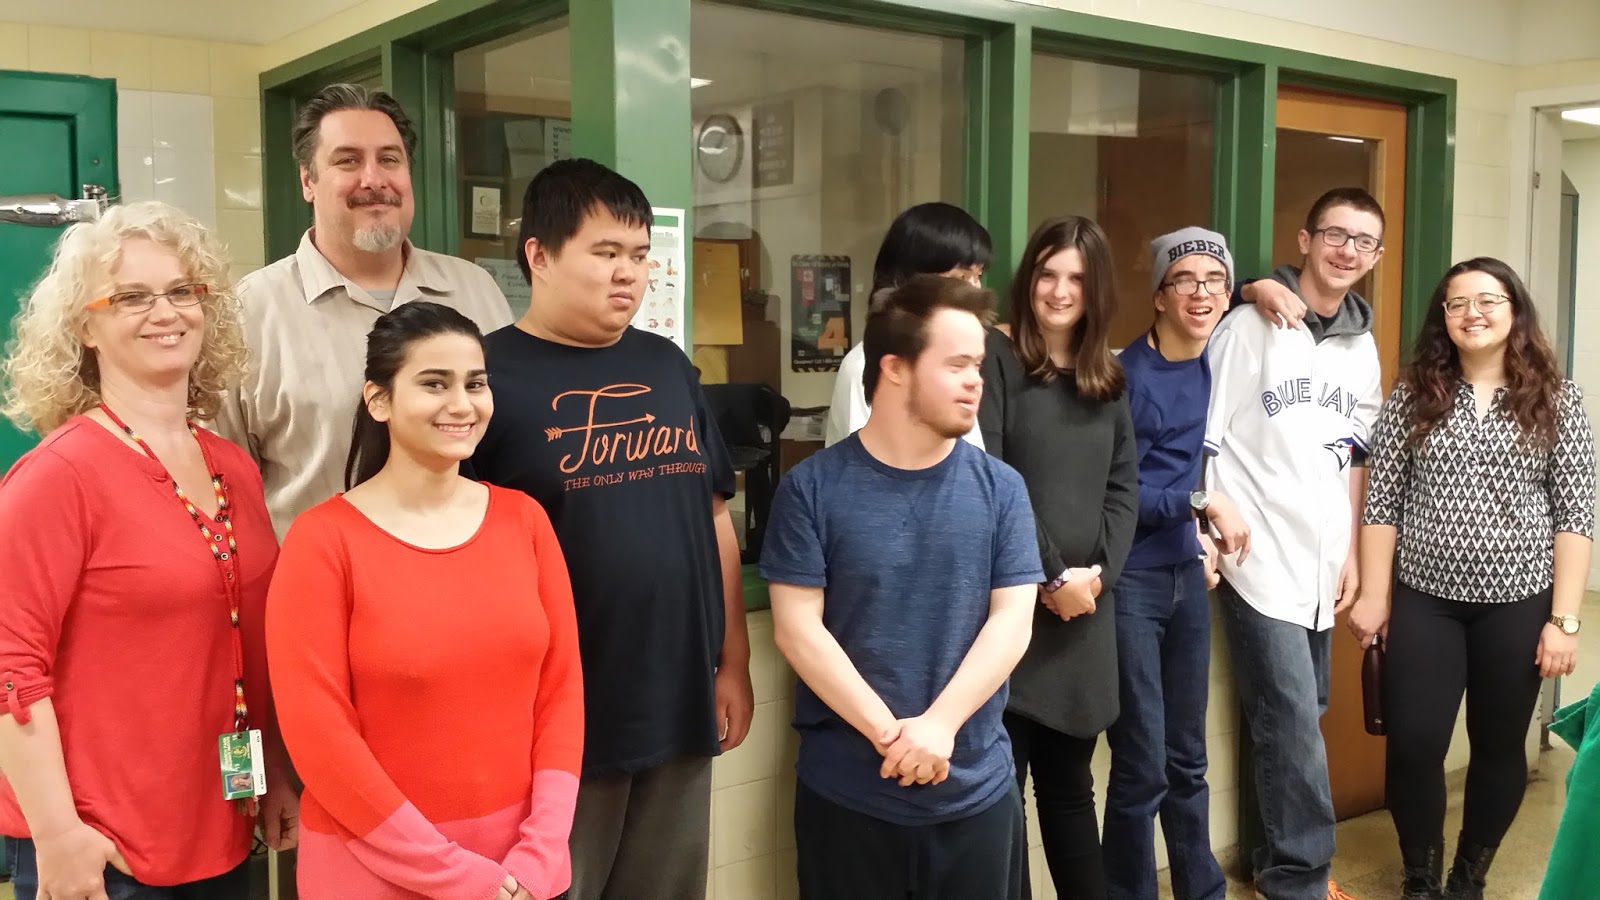
We lined up (sort of) and washed our hands.

My chef students served our guests
and helped them make their sandwiches ... then we all just quieted down and enjoyed delicious food, home-made, a treat in every way.

Dan Howell of HiLow Farm, thank you for the outstanding beef!
I hope we did you proud. We always give special thanks to our farmers.

A particular thanks to Chef Jessica
who, in addition to all her other duties, took all these pictures on Chef's phone.

A very special early-riser thanks to Chef Karlye, our 7 AM bread-maker. You made simply wonderful ciabatta Chef.

Have a good week-end everyone!


Thursday 14 April 2016

Tenderloin ... beautiful Pork Tenderloin !

Gentle Reader, there are few things more worthy of celebration that a lovely dish from a good kitchen prepared by a passionate cook and served just right. The past few days have simply been wonderful, with my student chefs quickly mastering both technique and artistry of presentation of two ways to offer pork tenderloin.

First, the recipes (which you can download and print for yourself, the same as you can do with every recipe in this entire blog):

The trick to getting these recipes right is timing.

The best way to ensure fine timing is to pre-heat the oven(s) and ensure all mis-en-place is complete.

So ... here goes. This blog entry will touch on aspects of BOTH recipes, and show steps along the way (not all of them). Then ... the final results!

Here we go.

First, prepare the rub chosen and get all the ingredients put into a zip-lock bag. I do NOT recommend using the bags with the actual zipper that travels across the opening ... these tend to leak a bit ... just use the ones with the double-closing at the top. We always use 'freezer bags' in our kitchens. Set the prepared bags aside and take the tenderloin(s) out of the frig.

Next, clean the tenderloin(s) of excess fat and silverskin (the connective tissue between the fat and the meat). Reserve them in a bowl or on the edge of your cutting board.

Ensure that the ovens are really ready to go!

OVEN COMMENTARY:

I always teach my students to start with an oven between 25 and 35 degrees hotter than the recipe calls for if they want to sear or make bread ... get the protein or bread into the very hot oven, let the blast of heat start the process and THEN turn the heat down. The technique for these tenderloin recipes is very simillar ... we start at 425 with full convection (which means we have the thermostat set to 450) a nd turn it down after about 8 minutes. (When I make bread I always start with an oven 25 degrees hotter than my baking is to be done at, then after the product is in the oven I cut the heat down after the first crust-spray.)

BACK TO THE FOOD:

We do our tenderloins on racks set in baking trays ... any drip is caught and clean-up is easy, and the tenderloin is roasted on all sides pretty evenly. Chef Victoria demonstrates the Thai tenderloin ready for the heat here.
Get them onto racks and get them right next to the oven to be used, then very quickly open the oven door with one hand whilst holding the tenderloin on the tray with the other. Chef Chris is showing off the rubbed tenderloin, ready to go.
Get the tray into the oven VERY fast ... we try for an oven-door opening of only one second (yes, one second ... that is not a mis-print!). Shut the oven and start your timing. While the timer ticks, do your clean-up!

The Thai-style tenderloin comes out of the oven ready to plate.

The crusted one needs a mushroom sauce made ... a little bit of onion, a little bit of good butter, a bit of red wine, a bit of good heavy cream and some mushrooms ... what could possibly go wrong? Here is Chef Jessica getting a sauce going.

Gently clarify the onions, and add the red wine. Reduce by 1/3 then add the cream ... reduce again. Clean the mushrooms and cut them up into medium-to-small pieces, of consistent size. When the sauce has about 10 minutes of simmering to go, stir in the mushrooms. Correct the taste with good salt and pepper at the last moment and spoon over the prepared tenderloin on a hot platter or presentation plate.

For a dish like this (whichever recipe you follow) be very sure to plate onto a hot plate or platter! Nothing will ruin a thoughtfully-made and carefully planned-for dish than the use, at the very end, of a cold presentation tray, platter or plate. Get it good and hot!

With the platter hot, slice your tenderloin
and set out for presentation.
Sauce well but not to excess. Share your delight and enjoy a delicious repast!

Please try to always support your Ontario farmers ... buy local pork if you possibly can.

As every cook knows, clean-up is easier when it is done with enthusiasm!

Monday 4 April 2016

Green Onion Cakes (Scallion Cakes) --- the best 'Home Food' anywhere (says Chef)

A long time ago when Chef had hair and he and his wife lived in Edmonton, they lived down the back alley from a wonderful local restaurant called "The Happy Garden". Chef Siu To and his wife Yaanar ran the place and it was both THE neighbourhood treat and one of Edmonton's quietly shared delights. The décor wasn't much to look at, and the table service could be a bit sketchy, but the food was always, ALWAYS, fabulously perfect.

The restaurant was not terribly busy in its early days, but one afternoon the Edmonton Journal food critic, Ms Judy Schultz, went in for an early dinner and the next day there was a glowing review of the food in the newspaper. All of a sudden there were lines out the door on many nights, and Chef To and the whole crew just worked like demons. The restaurant was greatly loved for many years. It has, sadly, closed now due to a new and very greedy landlord.

Chef To would not share recipes ... they were, after all, his livelihood, as they are for any restaurant. Judy Schultz finally managed to pry ONE recipe out of him ... for these delicious green onion cakes ... and I am delighted to share the recipe, and this story, with my students each semester.

Chef To's Green Onion Cakes caught on so well that other restaurants in the city decided to try and copy them (with mixed ... VERY mixed ... results). The quality improved as everyone worked hard to get it right, or develop their own twist on a revered recipe, and today in Mayfair Park in Edmonton in the summertime there is a Green Onion Cake Festival! This is Chef To's gift to Edmonton and Canada ... I call it "Edmonton's National Dish".

Here is the basic recipe. Print it out and be brave! Try this at home BUT be sure to get the right ingredients ... no trying to fake it, especially
by substituting another hot sauce for the Sambal Oelek or using regular sesame oil.

Here are the steps ... revealed by our Chef students.

Assemble the requirements and follow the recipe for making the basic dough.

Roll the dough out wide and flat and rectangular, as Chef Sarah is demonstrating.

Fill the dough with green onion bits, as Chef Sarah is starting,
and roll up into a long snake, as Chefs Chris and Dan show you here.

Cut the dough up into thick slices as shown by Chef Anakin .

Squish the slices in your hands. To start, Chef suggests that you align the tail end of the dough with your thumb ... so if you are right-handed, the dough is put into your LEFT hand and the end of the dough is at 9 o'clock, pointing towards 12. Squash it with your RIGHT hand on top, turning counter-clockwise. Then take each partially-flattened spiral and roll it flat between two layers of waxed paper.

Use some of the shortening/sesame mixture to do the frying in.
(If you want to be paid more, call it 'sautéing', but you can't fool everyone ... this is frying.) See the colour that should be achieved ... Chef Yung Feng demonstrates. .

Cut into 4 quarter-portions,
dip and ... and ... you're home.
What a wonderful feast ... easy to make, cheap to make and simply delicious.

And here we are ... another very satisfied customer (Ms Laura Houghton, our senior V-P) being our more-than-willing taste tester and product evaluator.

Well done everyone!